Simulating location in iOS
Matthew Wolfe
Software Testing Analyst

Occasionally, TELUS Digital is tasked with tracking location using our mobile apps. This enables us to do things such as change content dynamically based on where you are or track a route of a hike or a run. This can be a challenge in testing, and while we can and do take an actual run or drive to check that we’re updating the location accurately, this can take a lot of time and is limited to only our local area.
To save time or check how the product works in a remote location, we can simulate location. We do this using Xcode. While there are other methods, Xcode does not require wiping the device and can be used with the latest version of iOS. The following steps assume you have an existing project running from Xcode on your Mac. While you can set location easily using the Simulator, Xcode provides much more powerful tools for setting custom locations and even simulating movement. Here we’ll go over each option step by step.
Setting location in the simulator:
1. Once you have your app running in the simulator, navigate to Debug→Location in the menu.
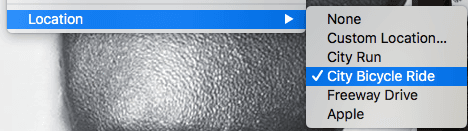
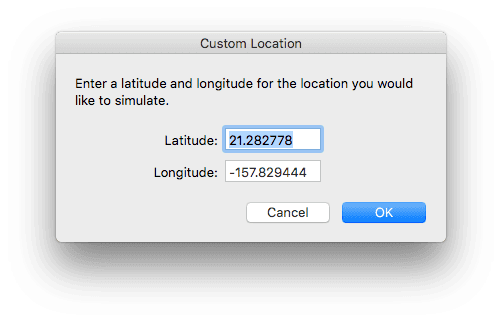
2. Apple gives you four default locations/routes, all in and around Cupertino, in addition to Custom Location… where you can manually input the latitude and longitude.
3. There are many places to get latitude and longitude, one of the most recognizable would be Google Maps.
4. To get the latitude and longitude from Google Maps simply click on the map at the location you want the info for
5. You will see something like this at the bottom of the screen:

6. Here, the latitude is 38.029401 and the longitude is -78.478768. These can be copied into the dialog above.
Setting the location in the scheme before building:
1. In Xcode with the project open and a device connected, navigate to Product→Scheme→Edit Scheme
2. With Run selected on the left, select the Options tab on the right
3. Check Allow Location Simulation (note: this will only show if a device is connected). You can now simulate your location
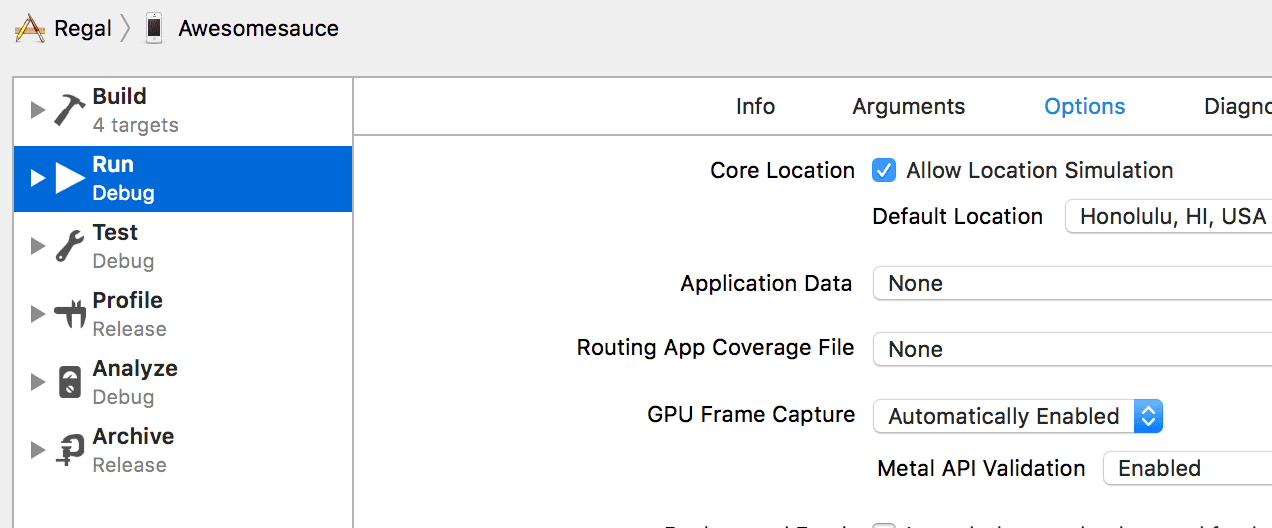
To set a default location to be used when the app is run from Xcode
1. Click the dropdown next to Default Location and select any location you want
2. The next time the app is run, it will use whatever you’ve selected
Setting a location after a build is running (Allow Location Simulation must be enabled in the Scheme):
1. Navigate to Debug→Simulate Location and select any location in the list. The device should immediately start using that location
The device or simulator should now show at the location you have selected. Once you’re running the app with a new location, you may need to open the Maps app to force the system to update the location. You may have noticed that when setting the location in the scheme or after the app is running, the option to Add GPX File to Workspace…
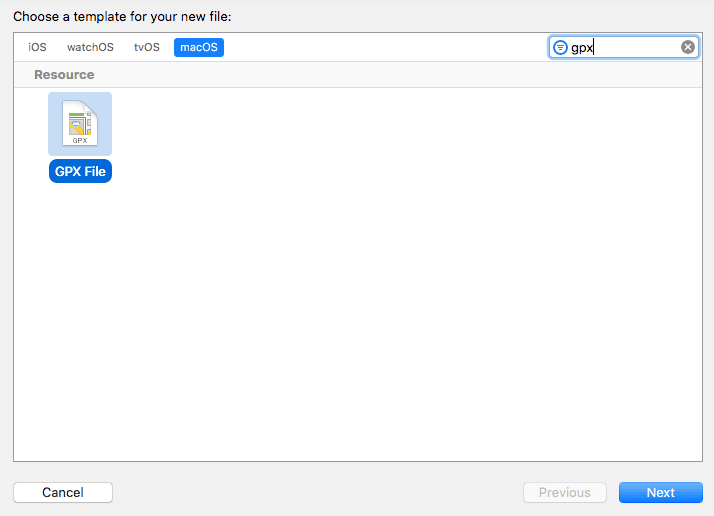
The built-in locations are useful, but sometimes you want to check a specific location on a device. Say you want to show the user information about the local football team that is not in any of the default cities. To do that you’ll need a custom GPX file. Getting a GPX file. A GPX file uses latitude and longitude to specify location. First, you’ll need to find this data. See above for a quick way to obtain this from Google Maps.
Next, you’ll need to create the GPX file. You can use Xcode to create the GPX file. In Xcode, navigate to File→New→File… This will give you the option to select a template. The ‘GPX’ template should be under macOS, you may filter by ‘gpx’ and you should see the option, select and click Next:
The next dialog allows you to specify a location and name, etc. Once it’s created, it is filled with location data for Cupertino and some helpful hints. You can enter the latitude and longitude you want in place of the default. You can also manually create a GPX file; a GPX file is just a text file with the .gpx extension. The example below will put your device in Los Angeles.
Now you have a GPX file! Select it in your scheme before running or in the menu while running the app on your device. The final option is to simulate movement. This is a powerful tool that can be used to track a route, say for a hike or a run, or the speed of the user in general. To do this, you will need a GPX file with multiple points. If you created a GPX file using Xcode, you will see the following: Optionally, provide a time element for each waypoint. Xcode will interpolate movement at a rate of speed based on the time elapsed between each waypoint. If you do not provide a time element, then Xcode will use a fixed rate of speed. Waypoints must be sorted by time in ascending order. Following the above, I’ve created a GPX file for a very short walk in Charlottesville.
You can see there are additional tags (<name>, <ele>) not mentioned by the notes Xcode generates. These tags are ignored by Xcode currently (sorry Pokémon Go spoofers!).
There are many tools to create large GPX files easily. My favorite is mapstogpx, which will generate GPX files from directions from Google Maps. If you’re using other tools, you may run into a popular format used by bikers that uses the <trk> tag. Often, these can easily be converted to work with Xcode via find and replace and/or regex.
After disconnecting your device or simulator, it may still use the simulated location. If this is an issue, you can restart the device or use Reset Content and Settings in device settings.